Improve uBITX receive performance by CEC Firmware V1.07 (Without instruments)
(Maybe SSB will have slightly improved transmission performance)
Please refer to the link below for a detailed description of uBITX receive performance.
(I recommend that you read the following postings first)
http://www.hamskey.com/2018/04/improves-ubitx-receive-performance-by.html
This feature is not yet complete. When optimizing in LSB mode, USB mode may not increase performance. But do not worry. After the Beta version is finished, it will be optimized to USB and CWU mode automatically.
How to improve performance with software alone and Explanation of ATT function
Optimization of uBITX is based on LSB Mode. After changing uBITX to LSB mode, do the following.
1.Our Goals
We are trying to steer uBITX which works like this as follows. (By software)
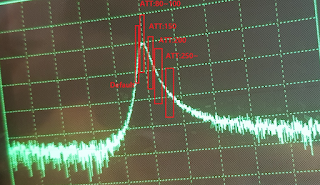
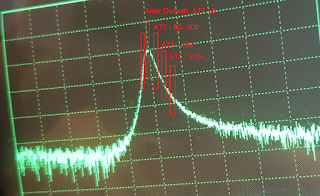
That is, we pass the signal we want to hear using the best part of the filter.
(Peak of above graph)
2.Test (factory firmware)
If you have already updated Firmware Version 1.07, you do not need to follow it.
It is a step to make sure that Original Firmware, CEC Firmware V1.06, and CEC firmware V1.07 without IF Adjust all have the same receiving performance.
This is the same because Version 1.06 uses the same logic.
Set uBITX to LSB Mode.
Find the frequency at which the signal continues to flow. FT-8, JT-65, CW, Beacon is good.
I chose the FT-8 signal because of poor antenna condition. The FT-8 always receives a signal.
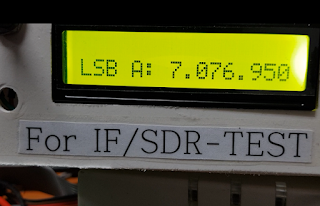
Select the frequency to store.
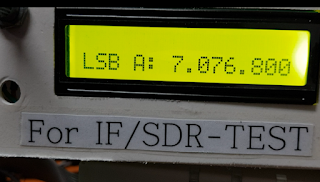
Switch to VfoB. and Switch to VfoA => The original firmware stores the frequency when switching Vfo.
Remember the size of the sound you receive.
At this time, an audio osciloscope may be used for the cell phone.
Upgrade firmware to 1.70 or higher.
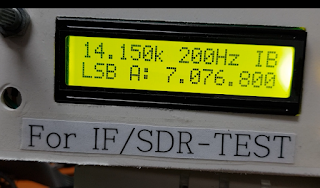
Even if the upgrade is completed, there will be no difference in the receive performance.
Improved reception performance
You can follow along from here. (CEC Firmware V1.07 or later)
3.Find optimized values (45Mhz IF) in uBITX
- Enter ATT menu.
Press the Key
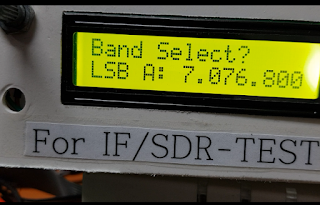
Select 'ATT On?'
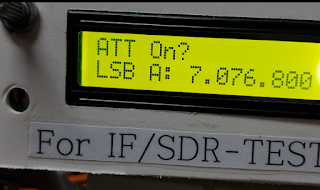
Press the Key
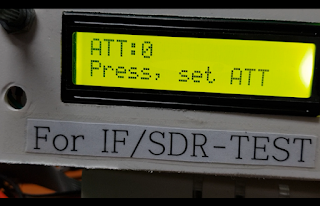
You will see 'ATT: 0'
The original intention is that the larger the ATT value, the lower the receive performance. That is, 'ATT: 0' means that receive performance is best.
For the FT-8, wait for the signal to start for a comparison of the receive sound.
If you are based on the Beacon signal, you do not have to wait.
When you are ready to compare the receive sound, try turning the dial.
(You can also refer to the video attached to this document.
In the attached video, you can check the sound size difference between 0, 80, and 200 (time : 1 :55 ~ 2 : 20))
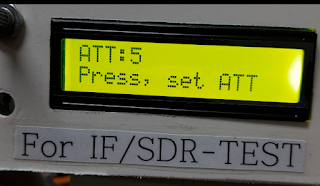
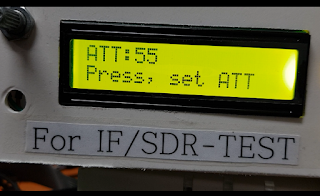
My uBITX had an optimal value of around 80. Your uBITX is expected to be similar.
However, depending on your uBITX status, the optimization values may be different.
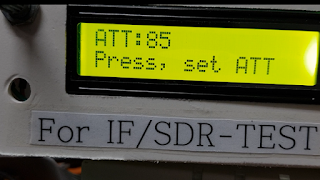
Remember the best value.
Optimum value should be saved in memory and applied to both sending and receiving.
4.Write optimal values to uBITX
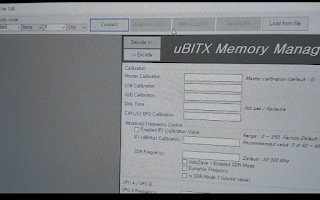
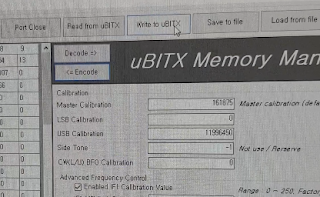
Connect -> Read from uBITX
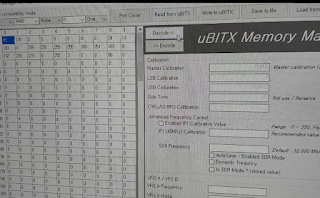
Click the 'Decode =>'
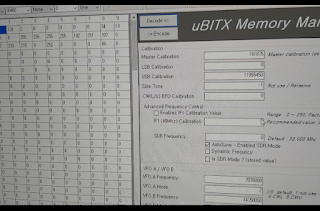
Checked the ''Enabled IF 1 Calibration value', and Input value to IF1(45Mhz) Calibration.
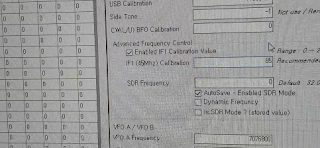
(After Version 1.071 there are a few more options)
At this point, if you get the optimal value of 85, If you enter subtract 15 ~ 20 (60) and you will feel better receive on both LSB and USB.
But it is not recommended.
Before the end of Firmware V1.07x beta, your uBITX will automatically have improved reception in both USB and CWU modes. (I've added some code to it for USB and CWU mode now)
Press the '<= Encode' button
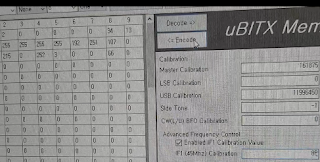
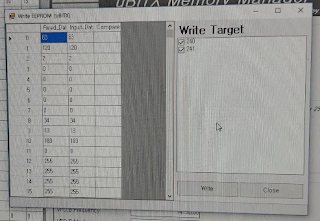
Press the 'Write to uBITX'
Press the 'Write' button
5.Reboot and Test
The next upcoming posting is to install SDR on uBITX. Maybe by connecting SDR to uBITX you might get a great idea.
As an experiment, we do not connect SDR.
I experimented with a low-cost SDR (RTL-SDR) of less than $ 10. I have several SDRs but have experimented with an easily convertible RTL-SDR.
I wanted to make something useful, not an experiment.
To do so, uBITX had to create optimal receive performance. Maybe it is to connect SDR to improve receive performance.
There are many people who know SDR more than I do. I want to think about ideas together.
(Maybe SSB will have slightly improved transmission performance)
This document is intended for uBITX users who use CEC Firmware.
Please refer to the link below for a detailed description of uBITX receive performance.
(I recommend that you read the following postings first)
http://www.hamskey.com/2018/04/improves-ubitx-receive-performance-by.html
This feature is not yet complete. When optimizing in LSB mode, USB mode may not increase performance. But do not worry. After the Beta version is finished, it will be optimized to USB and CWU mode automatically.
How to improve performance with software alone and Explanation of ATT function
Optimization of uBITX is based on LSB Mode. After changing uBITX to LSB mode, do the following.
1.Our Goals
We are trying to steer uBITX which works like this as follows. (By software)


That is, we pass the signal we want to hear using the best part of the filter.
(Peak of above graph)
2.Test (factory firmware)
If you have already updated Firmware Version 1.07, you do not need to follow it.
It is a step to make sure that Original Firmware, CEC Firmware V1.06, and CEC firmware V1.07 without IF Adjust all have the same receiving performance.
This is the same because Version 1.06 uses the same logic.
Set uBITX to LSB Mode.
Find the frequency at which the signal continues to flow. FT-8, JT-65, CW, Beacon is good.
I chose the FT-8 signal because of poor antenna condition. The FT-8 always receives a signal.

Select the frequency to store.

Switch to VfoB. and Switch to VfoA => The original firmware stores the frequency when switching Vfo.
Remember the size of the sound you receive.
At this time, an audio osciloscope may be used for the cell phone.
Upgrade firmware to 1.70 or higher.

Even if the upgrade is completed, there will be no difference in the receive performance.
Improved reception performance
You can follow along from here. (CEC Firmware V1.07 or later)
3.Find optimized values (45Mhz IF) in uBITX
Be sure to set or check the LSB mode before proceeding.
- Enter ATT menu.
Press the Key

Select 'ATT On?'

Press the Key
You will see 'ATT: 0'
The original intention is that the larger the ATT value, the lower the receive performance. That is, 'ATT: 0' means that receive performance is best.

For the FT-8, wait for the signal to start for a comparison of the receive sound.
If you are based on the Beacon signal, you do not have to wait.
When you are ready to compare the receive sound, try turning the dial.
(You can also refer to the video attached to this document.
In the attached video, you can check the sound size difference between 0, 80, and 200 (time : 1 :55 ~ 2 : 20))


My uBITX had an optimal value of around 80. Your uBITX is expected to be similar.
However, depending on your uBITX status, the optimization values may be different.

Remember the best value.
Optimum value should be saved in memory and applied to both sending and receiving.
4.Write optimal values to uBITX
Execute uBITX Manager
(If you are new to uBITX Manager, please read the posting about uBITX Manager on my blog : http://www.hamskey.com )
Connect -> Read from uBITX

Click the 'Decode =>'

Checked the ''Enabled IF 1 Calibration value', and Input value to IF1(45Mhz) Calibration.

(After Version 1.071 there are a few more options)
At this point, if you get the optimal value of 85, If you enter subtract 15 ~ 20 (60) and you will feel better receive on both LSB and USB.
But it is not recommended.
Before the end of Firmware V1.07x beta, your uBITX will automatically have improved reception in both USB and CWU modes. (I've added some code to it for USB and CWU mode now)
Press the '<= Encode' button

Press the 'Write to uBITX'

Press the 'Write' button

5.Reboot and Test
Reboot uBITX. The value written in uBITX Manager is reflected by rebooting uBITX.
If uBITX was rebooted, it probably was optimized.
Enter ATT menu for testing.
Try increasing the value in small increments.
'ATT: 0' is the most optimal condition, the more ATT value, the less the sound will be heard.
Again, if you only update the firmware Version 1.071 or Higher, your uBITX will automatically improve the reception performance in USB mode and CWU mode as well.
The video for this post is below.
6.conclusion
All tuning is over. It is simple.
Enter ATT Menu -> Turn the dial to find the loudest value -> Use uBITX Manager to enter a value in uBITX -> RebootThe next upcoming posting is to install SDR on uBITX. Maybe by connecting SDR to uBITX you might get a great idea.
As an experiment, we do not connect SDR.
I experimented with a low-cost SDR (RTL-SDR) of less than $ 10. I have several SDRs but have experimented with an easily convertible RTL-SDR.
I wanted to make something useful, not an experiment.
To do so, uBITX had to create optimal receive performance. Maybe it is to connect SDR to improve receive performance.
There are many people who know SDR more than I do. I want to think about ideas together.


Hi Ian.
ReplyDeleteThe 45MHz IF shift works well, 75 was the best setting for me.
Looking forward to the SDR bit soon.
Keep up the good work.
Philip G7JUR
Philip
DeleteYou've already tuned.
Thanks for testing.
Maybe now you may not have a improve on USB. Now I have modified it to shift based on LSB.
If you update to the following firmware, USB will be improved automatically.
And thanks for always testing the beta firmware.
Ian KD8CEC
Any plans to have a PWM output for DA conversion to use with a PIN diode attenuator? 73 de Adrian YO3HJV
ReplyDelete