This posting is for uBITX's new firmware (CEC Version 0.25 or later) users.
Those who use uBITX are mostly those who are skilled in radio. They can skip the begin of this document and see only the added features. This article is based on the person who first worked with uBITX.
If you have not upgraded the firmware yet, please refer to the link below to upgrade.
You can restore it to the original firmware whenever you do not like my new firmware. Do not worry.
http://www.hamskey.com/2018/01/release-beta-version-of-cat-support.html
This firmware fully communicates with most computer software.
But in this post I will only cover basic operations. I will post the connection with wsjtx or ham radio deluxe tomorrow.

1.Connect power to uBITX.
If the following screen appears for 0.5 seconds, your firmware has been upgraded.
(Must be CECBT version 0.25 or later.)
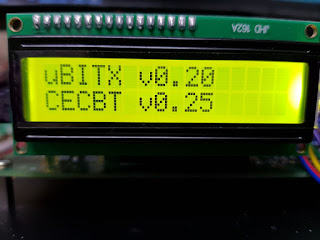
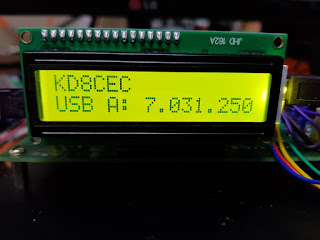
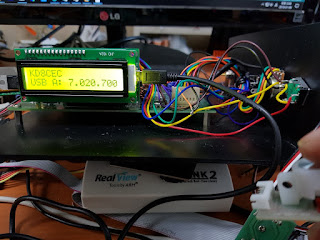
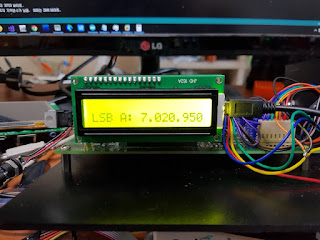
2.It will change as shown below.
Perhaps you have the first line empty.
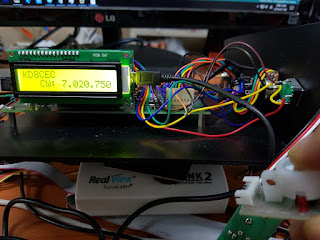
It is normal. Depending on the setting, you can display a call sign or message on the screen like me.
message is 'LSB A: 7.150.000'? It is normal. don't worry.
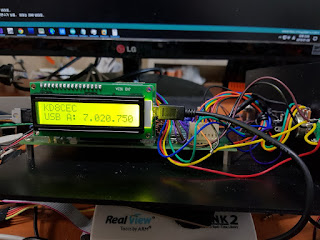
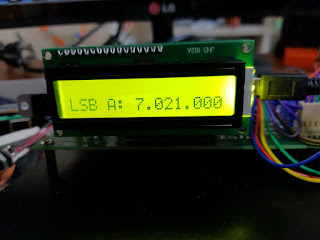
This status is called 'RX' status.
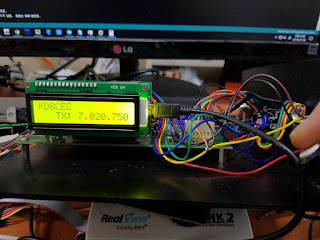
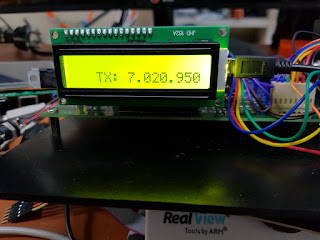
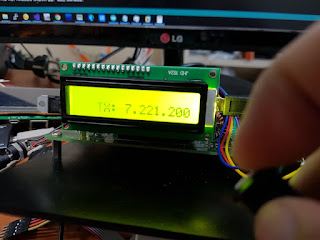
3.Press the PTT key.
The lcd below will be changed.
'TX:' means to transmit in ssb format.
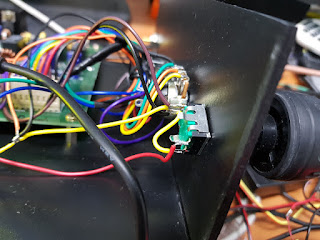
If you do not see the screen below, check your built-in PTT switch and microphone.
This status is called 'TX' status.
4.Release the PTT switch to return to 'RX' status.
5.Press the CW key.
The lcd below will be changed.
This status is called 'CW' status.
6.Release the PTT switch to return to 'RX' status.
7.Press the function key.
If you made it according to the guide, it will look like the picture below.
The function key is to press the dial.
If the function key is connected to a separate switch, press the switch.
The lcd below will be changed.
If you do not see the lcd below, check your built-in function key lines.
This status is called 'MENU' status.
8.Turn the dial clockwise. (little) - Explore the main menu
try a little more.
try a little more.
try a little more.
try a little more.

try a little more.
try a little more.
Press the function key.
Return to 'RX' status
we have looked at the main menu items.
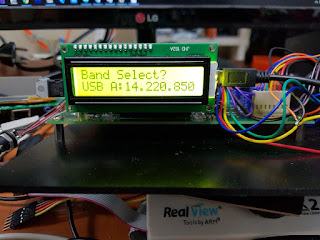
9.Changing the band
In 'RX' state, press function key to enter 'Menu' status.
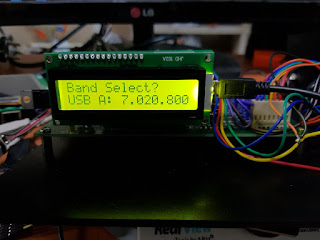
Press the function key.
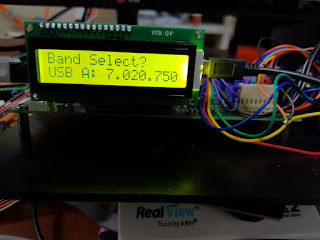
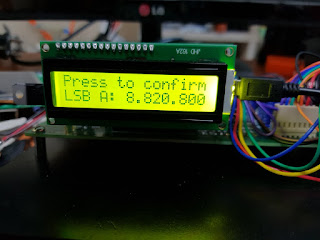
The lcd below will be changed.
Try turning the dial (Knob)
Probably the frequency will change greatly.
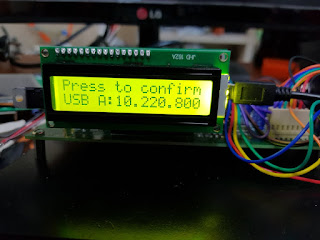
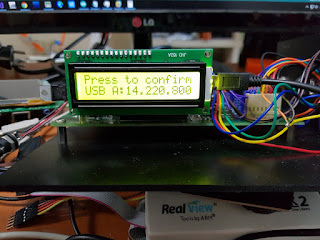
When the desired frequency band has been changed, press the function key.
Returned 'RX' status

Here you set the desired frequency.
Press the function key again to move the band. We will change to 7Mhz (40m) band.
When the desired frequency band has been changed, press the function key.
Returned 'RX' status


Then it will be in RX state again.
Now you can use the extended menu.
15.Press the function key then, turn the dial.
(You can skip this experiment)
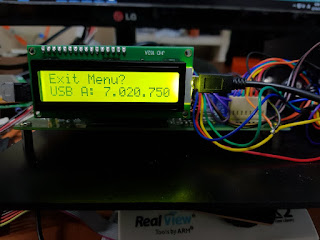
Probably you will see menus that you did not see when you looked at the menus above.
Menus appearing after 'Menu Exit' are called extended menus.
Turn the dial until the screen shown below appears.
When the screen is displayed, press the function key.
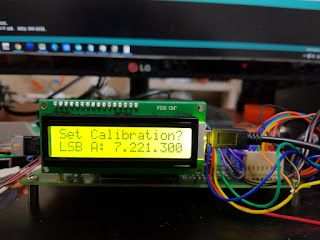
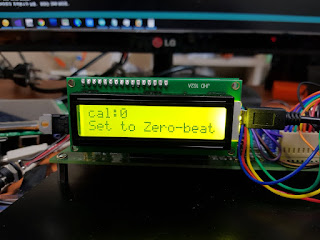
You can adjust your radio frequency.
The frequency setting is set to 7.000.000, but it is actually adjusted when going out to 7.000.010. If you have a frequency count, turn the frequency count on and turn the dial here to see that the frequency changes little by little.
However, in my opinion, most of these adjustments will not be needed much when you look at the performance of the si5351 and crystal used in uBITX.
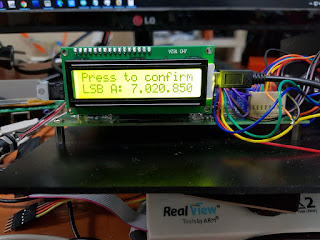
Press PTT only if you need precise adjustment.
When you are in the desired state, press PTT.
If this is pressed incorrectly, the frequency is not significantly wrong.
Do not worry.

Press the CW key in the RX state.
Can you hear the set sound?
The initial value of uBITX is 800.
Set it to 800 in the CW Side tone menu again and press PTT.
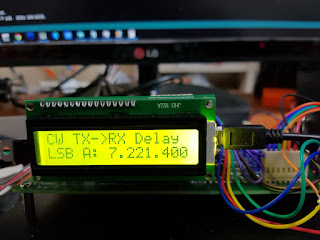
18.Use the function keys and dial to select 'CW TX->RX Delay' Let's make it appear.
It is a function to determine how long after CW key is released, switch from CW mode to RX mode.
Press the function key
Turn the dial on the screen below.

The value will change.
The value is milisecond.
If you send CW at high speed, lower the value and if you send CW at low speed, increase the value.
The default value of uBITX is 600.
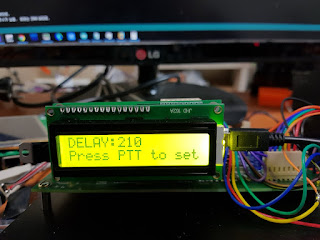
Press the PTT when the desired value is reached.
Then press PTT and the following screen will appear for 0.5 seconds.

Press the CW key in the RX state. Then release the CW key.
Do you like the time to switch to RX?
Repeat until you like.
In fact, all of these can be conveniently set by connecting the Ham radio deluxe to uBITX and swapping them with the mouse.
19.Use the function keys and dial to select 'CW Start Delay' Let's make it appear.
This means that when you press the CW key, the transceiver switches to TX mode and determines how long the CW tone will be transmitted.
Maybe if you have CW, it will be useful. You can fit your taste.
If you use an external device like Linear, it will be even more useful.
Press the function key
Default value is 0, Turn it until the value reaches 300 or more.
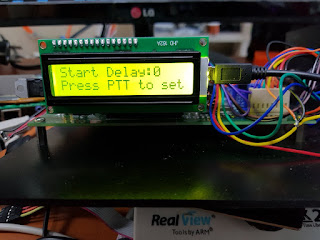
Then press PTT.
Then press PTT and the following screen will appear for 0.5 seconds.
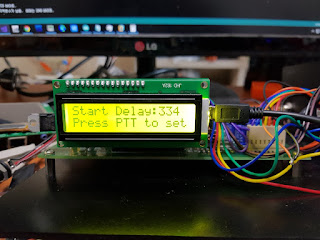
Press the CW key in the RX state.
20ms ~ 50ms were appropriate. But it depends on your radio condition and environment. default value is 0
20.Use the function keys and dial to select 'TX OFF?' Let's make it appear.
This function is used for radio settings or CW practice.
Even if you press the CW key, the sound will be heard, but the actual radio will not go out.
Press the Function key
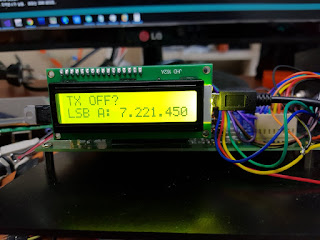
Then press Funtion and the following screen will appear for 0.5 seconds.
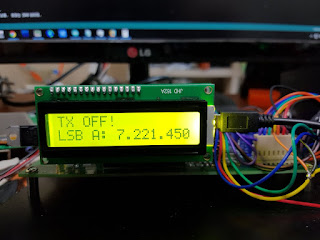
Press the CW key in the RX state.
Enter this menu again and press the function key to switch TX ON state.
If you have not upgraded the firmware yet, please refer to the link below to upgrade.
You can restore it to the original firmware whenever you do not like my new firmware. Do not worry.
http://www.hamskey.com/2018/01/release-beta-version-of-cat-support.html
This firmware fully communicates with most computer software.
But in this post I will only cover basic operations. I will post the connection with wsjtx or ham radio deluxe tomorrow.

1.Connect power to uBITX.
If the following screen appears for 0.5 seconds, your firmware has been upgraded.
(Must be CECBT version 0.25 or later.)

2.It will change as shown below.
Perhaps you have the first line empty.
It is normal. Depending on the setting, you can display a call sign or message on the screen like me.
message is 'LSB A: 7.150.000'? It is normal. don't worry.
This status is called 'RX' status.

3.Press the PTT key.
The lcd below will be changed.
'TX:' means to transmit in ssb format.
If you do not see the screen below, check your built-in PTT switch and microphone.
This status is called 'TX' status.

4.Release the PTT switch to return to 'RX' status.

5.Press the CW key.
The lcd below will be changed.
This status is called 'CW' status.
If you do not see the lcd below, check your built-in PTT Jack.

6.Release the PTT switch to return to 'RX' status.

7.Press the function key.
If you made it according to the guide, it will look like the picture below.
The function key is to press the dial.
If the function key is connected to a separate switch, press the switch.

The lcd below will be changed.
If you do not see the lcd below, check your built-in function key lines.
This status is called 'MENU' status.

8.Turn the dial clockwise. (little) - Explore the main menu

try a little more.

try a little more.

try a little more.

try a little more.

try a little more.

try a little more.

Press the function key.
Return to 'RX' status
we have looked at the main menu items.
9.Changing the band
In 'RX' state, press function key to enter 'Menu' status.

Press the function key.
The lcd below will be changed.

Try turning the dial (Knob)
Probably the frequency will change greatly.


When the desired frequency band has been changed, press the function key.
Returned 'RX' status

Here you set the desired frequency.
Press the function key again to move the band. We will change to 7Mhz (40m) band.


When the desired frequency band has been changed, press the function key.
Returned 'RX' status
Now you can move quickly to another band.
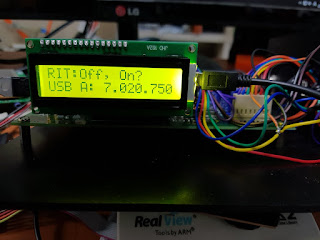
10.RIT
Press the function key to switch to the menu mode.
Turn clockwise until you see the screen below.
If you overdrive the dial too far, turn it counterclockwise as you are practicing above.
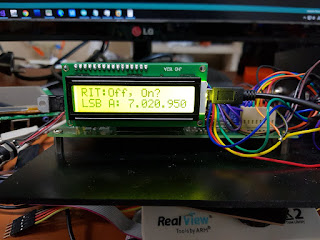
Press the function key
The following screen appears for 0.5 seconds only.
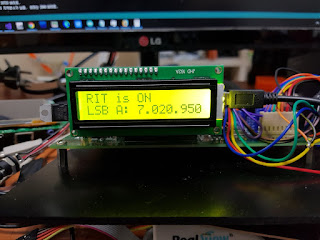
then, lcd below will be changed.
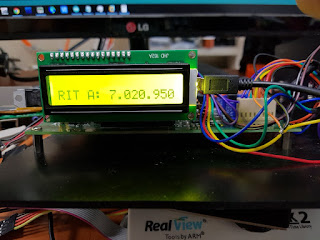
Try changing the frequency.
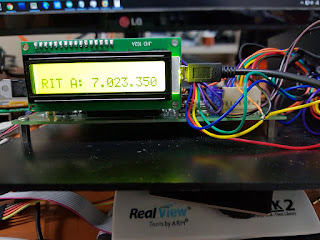
Press the PTT
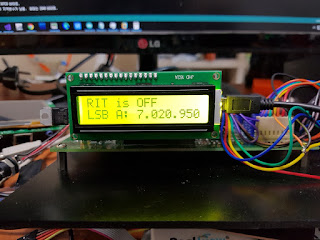
Did the TX frequency change? This is the RIT function.
Release the PTT.
It will change back to the previous frequency.
RIT is used to make the transmit and receive frequencies different.
Press the function key to switch to the menu mode.
Turn clockwise until you see the screen below.
If you overdrive the dial too far, turn it counterclockwise as you are practicing above.
Press the function key.
The following screen appears for 0.5 seconds only.
then, lcd below will be changed.
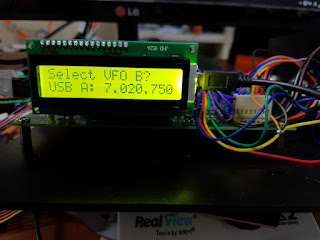
11.Change VFOA / VFOB
Use the function keys and dial to select 'Select VFO B?' Let's make it appear.
this called 'VFO toggle menu'
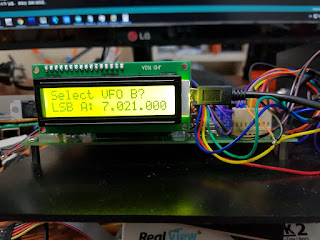
Press the function key
It will switch to VFO B mode.
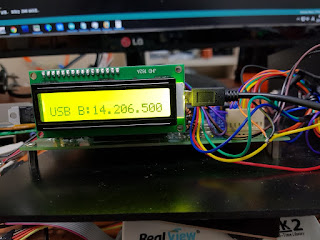
Press the function key.
You can move two VFO(A/B).
Note that the frequency is automatically stored in memory so that the frequency of VFOA and VFOB will remain the same even if the power is turned off and on again.
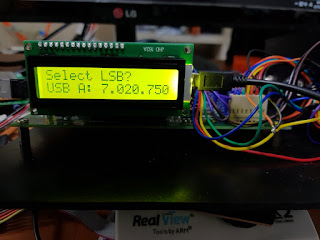
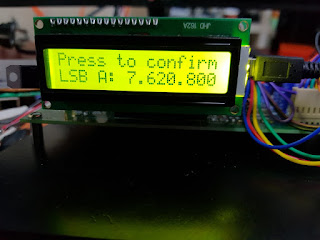
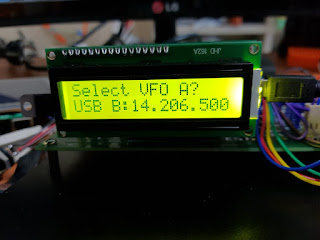
12.Use the function keys and dial to select 'Select USB?' or 'Select LSB' Let's make it appear. this called 'Mode toggle menu'
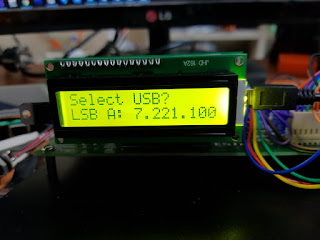
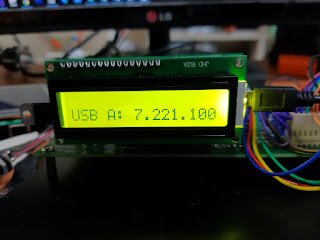
press the menu key.
then, changed mode.
Use the function keys and dial to select 'Select USB?' or 'Select LSB' Let's make it appear
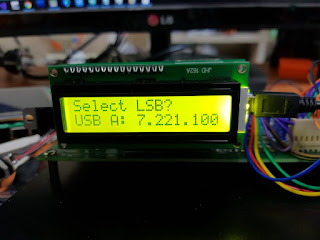
press the menu key.
then, changed mode.

Nowadays, even under 7Mhz, USB communication is used a lot.
Digital communications such as the FT-8 or JT65 communicate in USB mode on all bands. As the frequency is stored in the memory, the last used mode will be remembered even when the power is turned off.
However, when you change the frequency by turning the dial, it automatically selects the mode for the band.
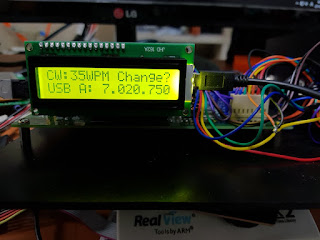
13.Use the function keys and dial to select 'CW:xxxWPM Change?' Let's make it appear.
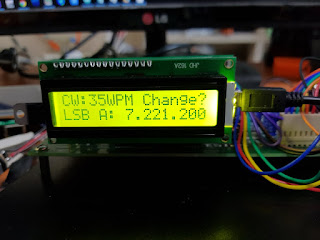
press the function key
then, lcd below will be changed.
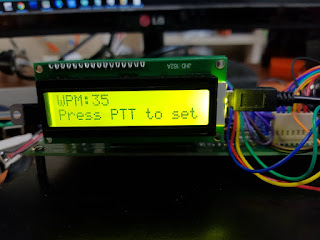
Turn the dial. Turn clockwise to increase the number. Turn counterclockwise to decrease the number. press the PTT when the desired speed is reached.
The speed at which the paddle key is used.
When PTT is pressed, the following screen appears for 0.5 seconds.
then changed, 'RX' status
Press the function key to switch to the menu mode.
Turn clockwise until you see the screen below.
If you overdrive the dial too far, turn it counterclockwise as you are practicing above.

Press the function key
The following screen appears for 0.5 seconds only.

then, lcd below will be changed.

Try changing the frequency.

Press the PTT
Did the TX frequency change? This is the RIT function.

Release the PTT.
It will change back to the previous frequency.
RIT is used to make the transmit and receive frequencies different.
Press the function key to switch to the menu mode.
Turn clockwise until you see the screen below.
If you overdrive the dial too far, turn it counterclockwise as you are practicing above.
Press the function key.
The following screen appears for 0.5 seconds only.

then, lcd below will be changed.

11.Change VFOA / VFOB
Use the function keys and dial to select 'Select VFO B?' Let's make it appear.
this called 'VFO toggle menu'

Press the function key
It will switch to VFO B mode.

Go to the VFO toggle menu.

Press the function key.

You can move two VFO(A/B).
Note that the frequency is automatically stored in memory so that the frequency of VFOA and VFOB will remain the same even if the power is turned off and on again.
12.Use the function keys and dial to select 'Select USB?' or 'Select LSB' Let's make it appear. this called 'Mode toggle menu'

press the menu key.
then, changed mode.

Use the function keys and dial to select 'Select USB?' or 'Select LSB' Let's make it appear

press the menu key.
then, changed mode.

Nowadays, even under 7Mhz, USB communication is used a lot.
Digital communications such as the FT-8 or JT65 communicate in USB mode on all bands. As the frequency is stored in the memory, the last used mode will be remembered even when the power is turned off.
However, when you change the frequency by turning the dial, it automatically selects the mode for the band.
13.Use the function keys and dial to select 'CW:xxxWPM Change?' Let's make it appear.

press the function key
then, lcd below will be changed.

Turn the dial. Turn clockwise to increase the number. Turn counterclockwise to decrease the number. press the PTT when the desired speed is reached.
The speed at which the paddle key is used.
When PTT is pressed, the following screen appears for 0.5 seconds.

then changed, 'RX' status

If you have a paddle key connected to uBITX, press the paddle key.
The transmission will be at the desired speed.
14.Use the function keys and dial to select 'CW AutoKey Mode?' Let's make it appear.

Press the function key.
The following screen will appear.

To use the CW Auto key, you must use the software called uBITX manager.
So, I will post the explanation of CW Auto Key after posting to uBITX Manager.
For those of you who are interested, we will link to the video.
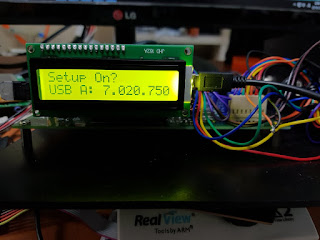
14.Use the function keys and dial to select 'Setup On?' Let's make it appear.

Press the function key in this state.
When function is pressed, the following screen appears for 0.5 seconds.

Now you can use the extended menu.
15.Press the function key then, turn the dial.
(You can skip this experiment)
Probably you will see menus that you did not see when you looked at the menus above.
Menus appearing after 'Menu Exit' are called extended menus.
Turn the dial until the screen shown below appears.
When the screen is displayed, press the function key.

You can adjust your radio frequency.
The frequency setting is set to 7.000.000, but it is actually adjusted when going out to 7.000.010. If you have a frequency count, turn the frequency count on and turn the dial here to see that the frequency changes little by little.
However, in my opinion, most of these adjustments will not be needed much when you look at the performance of the si5351 and crystal used in uBITX.
When you are in the desired state, press PTT.

If this is pressed incorrectly, the frequency is not significantly wrong.
Do not worry.
If you enter this menu again, the previous settings you have made will be ignored and the initial value of 0 will be displayed.
Pressing PTT will return to the original state.
If you want to practice, try it.
16.Use the function keys and dial to select 'Set the BFO' Let's make it appear.
(You can skip this experiment.)
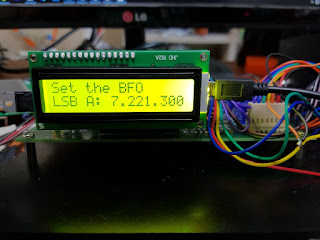
When the screen is displayed, press the function key.
Turn the dial. The value will change.
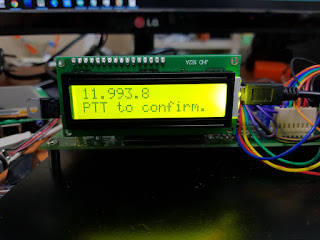
If the value has changed, press PTT.
If you are in 'RX' mode, try receiving LSB or USB.
If you change the value too much, you may not receive SSB.
You can try it out. don't worry.
Did not you hear the radio? You did well. Do you hear LSB communication better on USB? You did very well.
Again, do not worry.
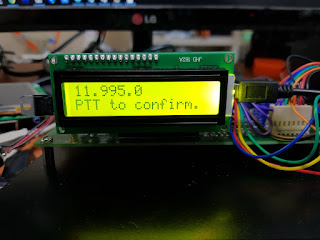
Use the function keys and dial to select 'Set the BFO' Let's make it appear.
When the screen is displayed, press the function key.
The default value is always 11.995.0. Do not turn the dial at this state and press PTT.
Your radio will return to its original state.
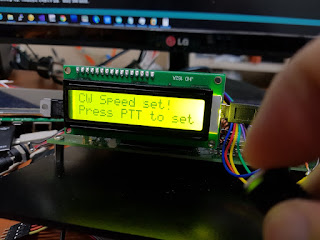
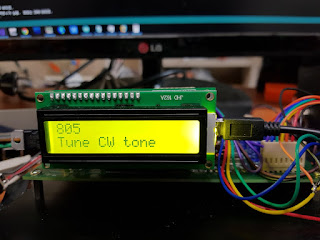
17.Use the function keys and dial to select 'Change CW Tone' Let's make it appear.
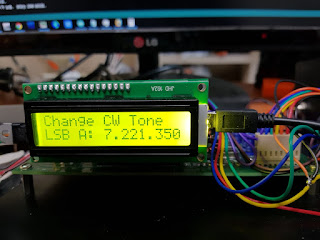

The CW key will start to sound.
Turning the dial will change the sound.
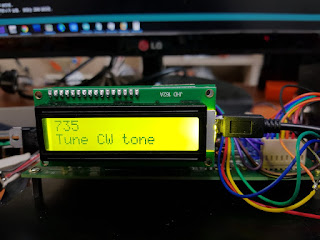
Stop when you hear a sound you like.
Then press PTT and the following screen will appear for 0.5 seconds.
(You can skip this experiment.)

When the screen is displayed, press the function key.

Turn the dial. The value will change.

If the value has changed, press PTT.
If you are in 'RX' mode, try receiving LSB or USB.
If you change the value too much, you may not receive SSB.
You can try it out. don't worry.
Did not you hear the radio? You did well. Do you hear LSB communication better on USB? You did very well.
Again, do not worry.
Use the function keys and dial to select 'Set the BFO' Let's make it appear.
When the screen is displayed, press the function key.
Your radio will return to its original state.
17.Use the function keys and dial to select 'Change CW Tone' Let's make it appear.

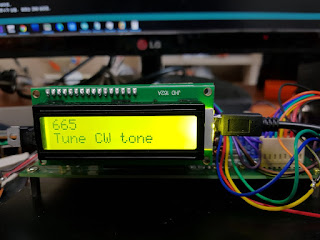
Press the Function Key

The CW key will start to sound.
Turning the dial will change the sound.


Stop when you hear a sound you like.

Then press PTT and the following screen will appear for 0.5 seconds.

Can you hear the set sound?
The initial value of uBITX is 800.
Set it to 800 in the CW Side tone menu again and press PTT.
18.Use the function keys and dial to select 'CW TX->RX Delay' Let's make it appear.
It is a function to determine how long after CW key is released, switch from CW mode to RX mode.
Press the function key

Turn the dial on the screen below.

The value will change.
The value is milisecond.
If you send CW at high speed, lower the value and if you send CW at low speed, increase the value.
The default value of uBITX is 600.

Press the PTT when the desired value is reached.
Then press PTT and the following screen will appear for 0.5 seconds.

Press the CW key in the RX state. Then release the CW key.
Do you like the time to switch to RX?
Repeat until you like.
In fact, all of these can be conveniently set by connecting the Ham radio deluxe to uBITX and swapping them with the mouse.
19.Use the function keys and dial to select 'CW Start Delay' Let's make it appear.
This means that when you press the CW key, the transceiver switches to TX mode and determines how long the CW tone will be transmitted.
Maybe if you have CW, it will be useful. You can fit your taste.
If you use an external device like Linear, it will be even more useful.
Press the function key
Default value is 0, Turn it until the value reaches 300 or more.

Then press PTT.
Then press PTT and the following screen will appear for 0.5 seconds.

Press the CW key in the RX state.
Probably after the CW key was pressed, the CW sound started to appear after a short delay. Repeat this operation to set the desired value.
20.Use the function keys and dial to select 'TX OFF?' Let's make it appear.
This function is used for radio settings or CW practice.
Even if you press the CW key, the sound will be heard, but the actual radio will not go out.
Press the Function key

Then press Funtion and the following screen will appear for 0.5 seconds.

Press the CW key in the RX state.
Probably CW sounds but relay did not work.
It is not switched to TX mode.Enter this menu again and press the function key to switch TX ON state.
This comment has been removed by the author.
ReplyDelete