Beta testing of the stand-alone WSPR feature built into uBITX -> Beta2
Changed to the second Beta version. Version Name : V1.051W
Version 1.06 will be released soon. Version 1.05xx should not be used anymore. Just a moment.
uBITX Firmware CEC Version 1.06 has been released.
Please click the link below.
http://www.hamskey.com/2018/03/cat-support-ubitx-firmware-cec-version_24.html
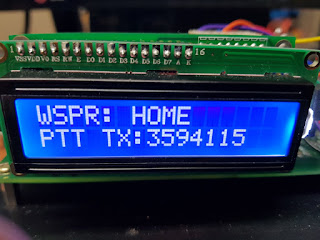
This article is about the WSPR beta test to be included in the next version of uBITX Firmware CEC Version.
I am looking for a beta tester.
Anyone who has uBITX with watch and knows how to use WSPR.
If you have experience using uBITX Manager, it is better.
WSPR will be transmitted for about 2 minutes. Test with the antenna connected.
I am not responsible for any problems that occur during testing.
If the SWR value is high, you will need an appropriate heat sink.
The preparations are as follows.
- uBITX
- wristwatch or cell phone(It is recommended if the electronic clock is displayed second), You can adjust it to standard time. It does not have to be very accurate.
Since uBITX do not have GPS built in, you have to press PTT at even minute 0 second.
1. Please download the uBITX firmware and uBITX Manager for WSPR Beta Tester from the link below.
(Beta WSPR_1.051 Version)
https://drive.google.com/open?id=1jgILYYVmFEk5gPu2d7Cu6FtIQigahd1C
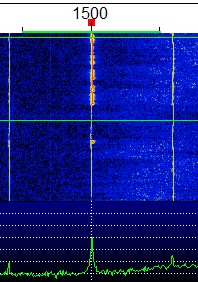
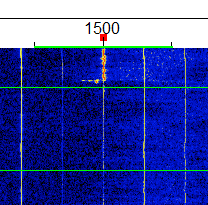
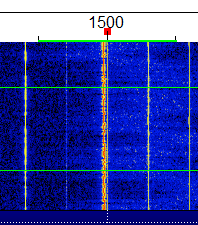
In the Beta 2 version, the Calibration item has been added.
By default, uBITX's Master Calibration value is imported.
Sometimes it can be used as it is, but it is relatively accurate if you modify it a bit more.
In my case, the Master Calibration is 140000, but the WSPR transmission result is 146000, which is the correct calibration.
2. Please refer to the following link for firmware upgrade.
http://www.hamskey.com/2018/01/how-to-upgrade-ubitx-firmware.html
3.The descriptions below seem complex, but they are simple to configure.
All settings required for WSPR transmission are pre-entered in uBITX.
Callsign, grid, db and frequency information to be used for transmission are stored in uBITX.
Outdoors, uBITX and antennas are all you need to transmit WSPR with pre-populated information.
I have explained it in a way that follows.
4.Run uBITX Manager.
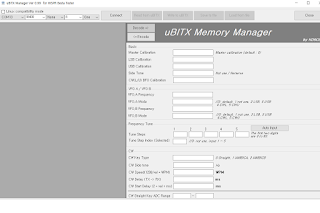
5.Connect to uBITX
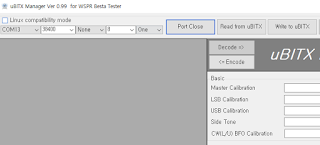
6.Press the 'Read from uBITX' button
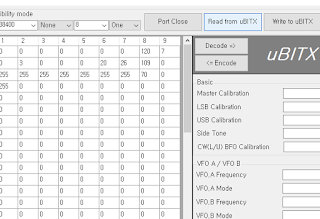
7.Press the 'Decode' Button
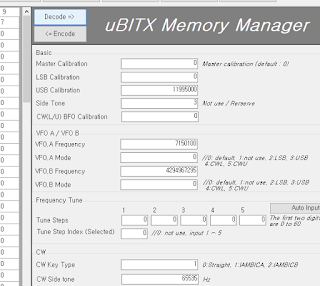
8.Down Scroll - you will see the WSPR-configuration section
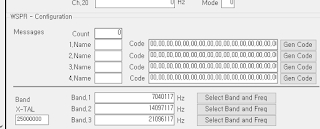
9.Type '4' in the Count field.
- This is to select the area where you want to send WSPR when you travel.
If you do not have a long distance travel plan, you can enter 1.

10. Enter a name in the four Name fields. (Max Length = 5)
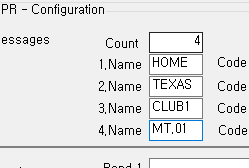
11.Press the 'Gen Code' Button

12.Enter WSPR Informations

13.Press the 'Generate Message' Button
- you can see the gerated code

14. The rest of the code is generated in the same way as in 13.
If uBITX is shared with others, you can enter another callsign
Below is an example I entered.


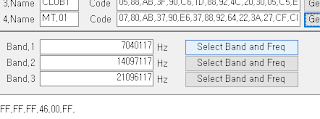
15.Select the bands you want to use.
You must enter all three bands.
Please correct the added calibration value in the second Beta version.
Default : Master Calibration
In my case, Master Calibration 140000, WSPR Calibration 146000
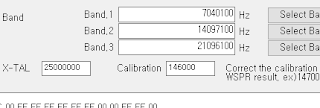
Press the 'Select Band and Freq'
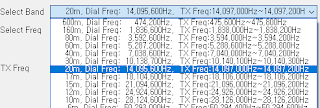
16.Select band
17.Select TX Freq (use progress bar)
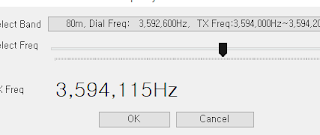
18.The other two bands are input in the same way.
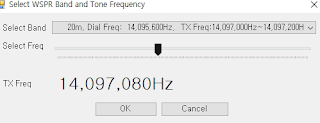
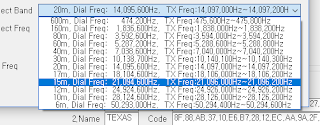
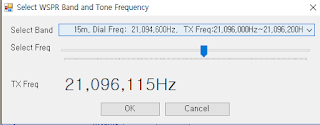
19.Press the 'Encode' Button
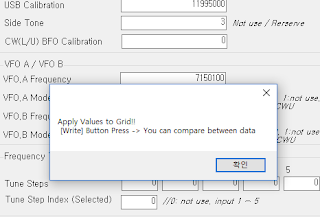
20.Press the 'Write to uBITX' button
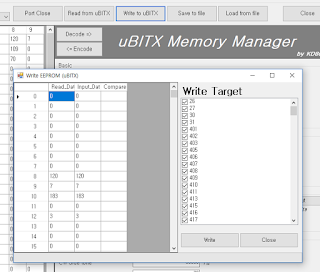
21.Press the 'Write' Button
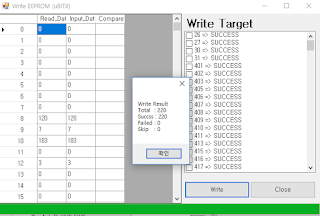
22.Close uBITX Manager
If you have worked so far, you no longer need a computer.
Just go up the mountain with uBITX and antenna and you will be able to see where your radio reaches.Since all the information about WSPR has been entered, you can send WSPR from uBITX with simple operation.
23.Select WSPR Beacon from the uBITX menu.
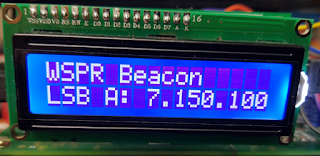
24.Press the function Key
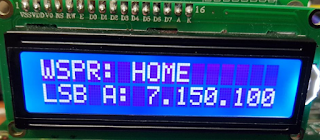
25.Turn the dial to select the message you want to transfer to WSPR.
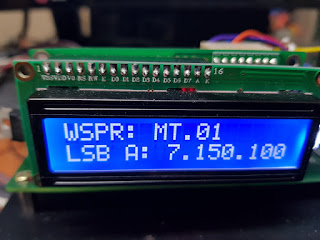
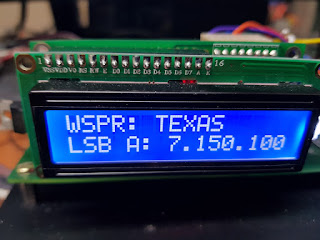
26.Press the function Key

25.Turn the dial to select the Band you want to transfer to WSPR.
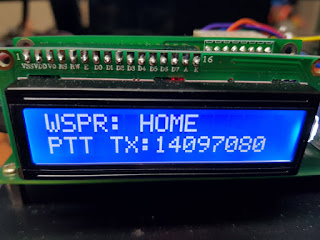
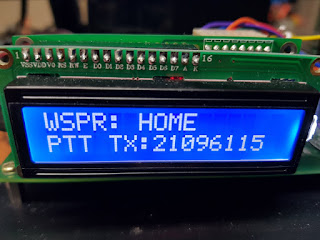
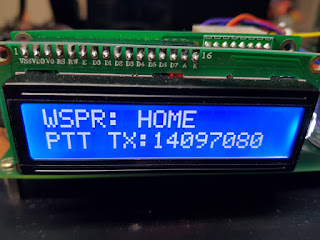
26.Watch the clock - Press PTT when the number of minutes equals 0 seconds.
Transmitting indicator appears and WSPR transmission starts.
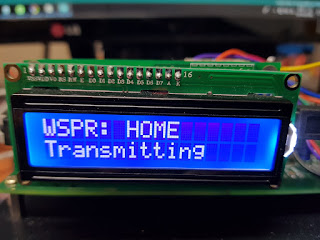
After transmitting for about 2 minutes, return to Band Select screen.
if you want to send it back to another band. Use the dial to select another band, then press PTT.
27. Press the Function key to exit WSPR menu.
The following video was taken after I wrote this article.
Note : Beta2 Calibraion Results
In case of 40M
In case of 630M
In case of 10M
Changed to the second Beta version. Version Name : V1.051W
Version 1.06 will be released soon. Version 1.05xx should not be used anymore. Just a moment.
uBITX Firmware CEC Version 1.06 has been released.
Please click the link below.
http://www.hamskey.com/2018/03/cat-support-ubitx-firmware-cec-version_24.html

This article is about the WSPR beta test to be included in the next version of uBITX Firmware CEC Version.
I am looking for a beta tester.
Anyone who has uBITX with watch and knows how to use WSPR.
If you have experience using uBITX Manager, it is better.
WSPR will be transmitted for about 2 minutes. Test with the antenna connected.
I am not responsible for any problems that occur during testing.
If the SWR value is high, you will need an appropriate heat sink.
The preparations are as follows.
- uBITX
- wristwatch or cell phone(It is recommended if the electronic clock is displayed second), You can adjust it to standard time. It does not have to be very accurate.
Since uBITX do not have GPS built in, you have to press PTT at even minute 0 second.
1. Please download the uBITX firmware and uBITX Manager for WSPR Beta Tester from the link below.
(Beta WSPR_1.051 Version)
https://drive.google.com/open?id=1jgILYYVmFEk5gPu2d7Cu6FtIQigahd1C
In the Beta 2 version, the Calibration item has been added.
By default, uBITX's Master Calibration value is imported.
Sometimes it can be used as it is, but it is relatively accurate if you modify it a bit more.
In my case, the Master Calibration is 140000, but the WSPR transmission result is 146000, which is the correct calibration.
2. Please refer to the following link for firmware upgrade.
http://www.hamskey.com/2018/01/how-to-upgrade-ubitx-firmware.html
3.The descriptions below seem complex, but they are simple to configure.
All settings required for WSPR transmission are pre-entered in uBITX.
Callsign, grid, db and frequency information to be used for transmission are stored in uBITX.
Outdoors, uBITX and antennas are all you need to transmit WSPR with pre-populated information.
I have explained it in a way that follows.
4.Run uBITX Manager.

5.Connect to uBITX

6.Press the 'Read from uBITX' button

7.Press the 'Decode' Button

8.Down Scroll - you will see the WSPR-configuration section

9.Type '4' in the Count field.
- This is to select the area where you want to send WSPR when you travel.
If you do not have a long distance travel plan, you can enter 1.

10. Enter a name in the four Name fields. (Max Length = 5)

11.Press the 'Gen Code' Button

12.Enter WSPR Informations

13.Press the 'Generate Message' Button
- you can see the gerated code

14. The rest of the code is generated in the same way as in 13.
If uBITX is shared with others, you can enter another callsign
Below is an example I entered.


15.Select the bands you want to use.
You must enter all three bands.
Please correct the added calibration value in the second Beta version.
Default : Master Calibration
In my case, Master Calibration 140000, WSPR Calibration 146000

Press the 'Select Band and Freq'

16.Select band


18.The other two bands are input in the same way.


19.Press the 'Encode' Button

20.Press the 'Write to uBITX' button

21.Press the 'Write' Button

22.Close uBITX Manager
If you have worked so far, you no longer need a computer.
Just go up the mountain with uBITX and antenna and you will be able to see where your radio reaches.Since all the information about WSPR has been entered, you can send WSPR from uBITX with simple operation.
23.Select WSPR Beacon from the uBITX menu.

24.Press the function Key

25.Turn the dial to select the message you want to transfer to WSPR.


26.Press the function Key

25.Turn the dial to select the Band you want to transfer to WSPR.


26.Watch the clock - Press PTT when the number of minutes equals 0 seconds.
Transmitting indicator appears and WSPR transmission starts.

After transmitting for about 2 minutes, return to Band Select screen.
if you want to send it back to another band. Use the dial to select another band, then press PTT.
27. Press the Function key to exit WSPR menu.
The following video was taken after I wrote this article.
Note : Beta2 Calibraion Results
In case of 40M

In case of 630M

In case of 10M


There is a communication problem..... Manager doesn't get info from ubitx.
ReplyDeleteubitx firmware is 1.04 the manager wspr is 0.99 ...(must be v1.00?)
carlos
Sorry, Firmware i 1.05_w
ReplyDeleteSorry to all about this monologue ... everythimg is working fine now. MY FAULT.
ReplyDelete73's carlos
Carlos
Deletesorry for late reply.
I can mostly check the mail after this time. i am glad you have solved it.
If you have any further problems, please check below.
1.First, test with a communication program such as Ham radio deluxe or Wsjt-x to check the communication status.
2.Occasionally, such a problem can occur if the thickness of the USB cable is thin.
3.uBITX Firmware CEC Version may not be able to CAT communicate when WSPR are used.
4.This is when you entered the WSPR menu.
thank you for your hard work.
Ian KD8CEC