1.Items
Raspberry pi 3 or 2
SD Card
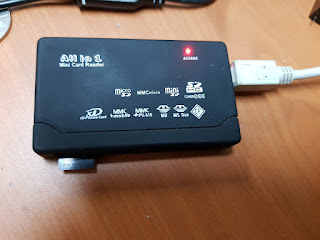
SD-Card Read Writer
and Computer...

2.Down load Raspberry pi OS Image
https://www.raspberrypi.org/downloads/raspbian/
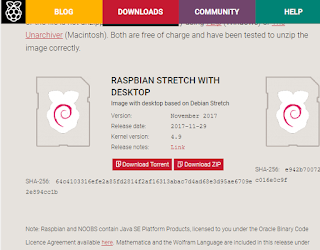
Click Raspbian desktop
you choice option, direct download (Download Zip) button, and download via torrent (Download Torrent) button
3.Extract the downloaded file.

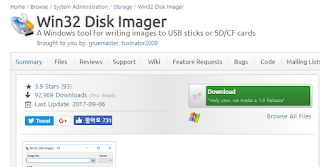
4.Download & Install Win32diskimager
download from https://sourceforge.net/projects/win32diskimager/
5.Insert the SD card into the SD card reader.
6.Connect the SD card reader to the computer.
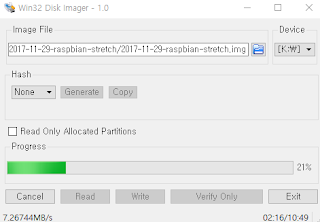
7.Run Win32diskimager
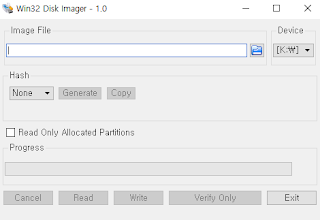
Select to extracted Raspberry pi os image.

Select Device (SD-Card Drive)
8.Click to [Write] Button
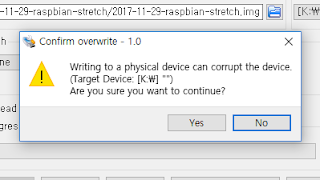
Confirm the disk name and press Yes. (Warning)
If you do not select SD-CARD and chose the hard disk, you lose data.
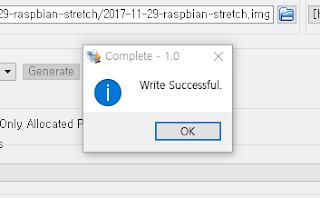
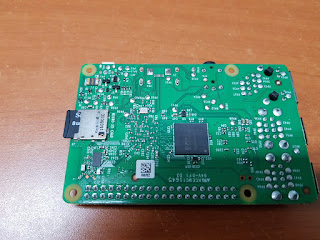
9.When all the processing is completed, remove the SD-Card from the reader.
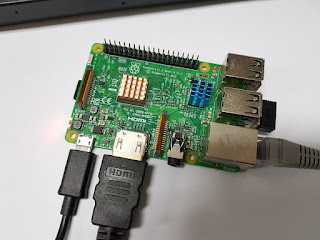
10.Insert the SD-Card into the raspberry pi.
11.Connect a keyboard mouse monitor, network cable, etc. to the raspberry pi.
12.Connect the power to the raspberry pi - Micro usb connector (using 2~3A adaptor)
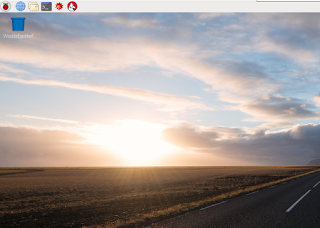
13.You can see the Raspberry Pie desktop screen.
14.Setting Ethernet if you want.
(I mainly connect remotely, I set it as fixed ip as below)
******************* A. Ethernet Setting **************************
A1.Click Terminal icon on Taskbar
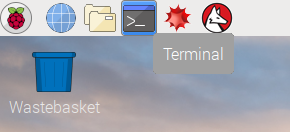
A2. type 'sudo nano /etc/network/interfaces' [Enter]

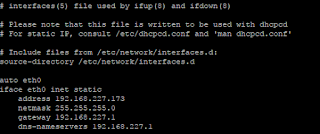
A3. Enter the following information
(Below is an example of changing the IP-address of the raspberry pi to 192.168.227.173)
# Include files from /etc/network/interfaces.d:
source-directory /etc/network/interfaces.d
auto eth0
iface eth0 inet static
address 192.168.227.173
netmask 255.255.255.0
gateway 192.168.227.1
dns-nameservers 192.168.227.1
A4.press CTRL + x

A5. press 'y'

A6. Press Enter
A7. type 'sudo reboot' [Enter], then Raspberry pi will reboot

A8.The raspberry pie will have been changed to the IP you set.
15.Change the required services or functions to Enabled
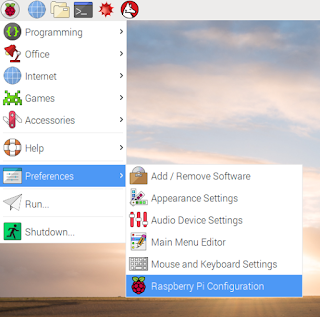
Click the Raspberry Pie button on the taskbar.
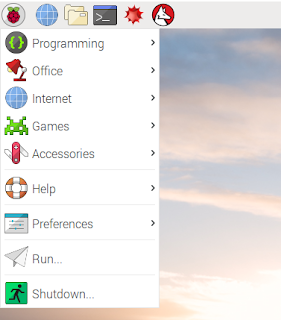
Click to Raspberry Configuration menu
Click (Enabled) the Raspberry Pi button on the taskbar.
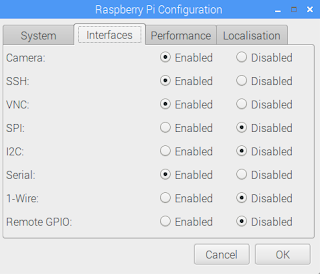
Press [OK] Key and reboot Raspberry pi
--------------------------------------------------
Reference
3.2 LCD, 3.5 LCD, 3.9 LCD for raspberry pi Configuration
https://github.com/goodtft/LCD-show
Allow login ssh (root) :
set root passwd
sudo passwd root
sudo nano /etc/ssh/sshd_config
Change to
PermitRootLogin yes
Raspberry pi 3 or 2
SD Card
SD-Card Read Writer
and Computer...

2.Down load Raspberry pi OS Image
https://www.raspberrypi.org/downloads/raspbian/

Click Raspbian desktop
you choice option, direct download (Download Zip) button, and download via torrent (Download Torrent) button
3.Extract the downloaded file.

4.Download & Install Win32diskimager
download from https://sourceforge.net/projects/win32diskimager/

5.Insert the SD card into the SD card reader.
6.Connect the SD card reader to the computer.

7.Run Win32diskimager

Select to extracted Raspberry pi os image.

Select Device (SD-Card Drive)
8.Click to [Write] Button

Confirm the disk name and press Yes. (Warning)
If you do not select SD-CARD and chose the hard disk, you lose data.

9.When all the processing is completed, remove the SD-Card from the reader.

10.Insert the SD-Card into the raspberry pi.

11.Connect a keyboard mouse monitor, network cable, etc. to the raspberry pi.
12.Connect the power to the raspberry pi - Micro usb connector (using 2~3A adaptor)

13.You can see the Raspberry Pie desktop screen.

14.Setting Ethernet if you want.
(I mainly connect remotely, I set it as fixed ip as below)
******************* A. Ethernet Setting **************************
A1.Click Terminal icon on Taskbar

A2. type 'sudo nano /etc/network/interfaces' [Enter]

A3. Enter the following information
(Below is an example of changing the IP-address of the raspberry pi to 192.168.227.173)
# Include files from /etc/network/interfaces.d:
source-directory /etc/network/interfaces.d
auto eth0
iface eth0 inet static
address 192.168.227.173
netmask 255.255.255.0
gateway 192.168.227.1
dns-nameservers 192.168.227.1

A4.press CTRL + x
A5. press 'y'
A6. Press Enter
A7. type 'sudo reboot' [Enter], then Raspberry pi will reboot
A8.The raspberry pie will have been changed to the IP you set.
15.Change the required services or functions to Enabled
Click the Raspberry Pie button on the taskbar.

Click to Raspberry Configuration menu

Click (Enabled) the Raspberry Pi button on the taskbar.

Press [OK] Key and reboot Raspberry pi
--------------------------------------------------
Reference
3.2 LCD, 3.5 LCD, 3.9 LCD for raspberry pi Configuration
https://github.com/goodtft/LCD-show
Allow login ssh (root) :
set root passwd
sudo passwd root
sudo nano /etc/ssh/sshd_config
Change to
PermitRootLogin yes
Laptop SSD Upgrade in Mumbai | Laptop RAM Upgrade in Mumbai | Hp Laptop Charger Replacement in Mumbai | Dell Laptop Battery Replacement in Mumbai | Laptop Screen Replacement in Mumbai | Hp Laptop Screen Replacement Malad | Acer Laptop Screen Replacement Goregaon | Lenovo Laptop Screen Repair Mumbai
ReplyDelete